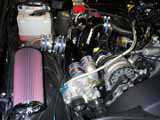
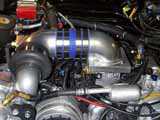
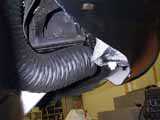
1) How low the SC is sitting, the inlet is just inches away from the headers and it superheated the air inlet track
2) How big the K&N Filter is. It flows nearly 1200cfm on a naturally aspirated engine. Later I enclose it with a housing and fresh air inlet
3) Notice how the incoming air travels downward to the supercharger and up and over for the outlet. The compressed side or outlet goes from 2.75" to 3.5"-The new is 4" all the way.
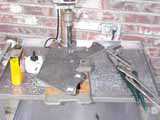
This is the new bracket I made out of 3/8 steel. I made a template out of 1/16 aluminum, bolted it to the engine and SC for a perfect fit. I then transferred the design to the final piece of steel.
Notice the lack of proper tools, I used a hacksaw to cut the pattern in the 3/8 steel. It took around 5 hours of pure determination and around 10 blades to finish!
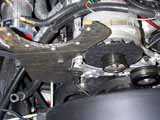
This is the new bracket bolted to the block.
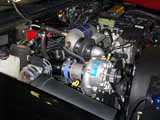
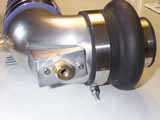
This is after the SC upgrade-notice how much higher the supercharger sits, 7 inches to be exact!
Notice the nice straight free flowing path the air travels now both on the inlet and outlet compared to the original install. The outlet is now 4" with nice smooth elbows
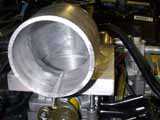
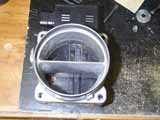
This is a shot looking down into the throttle body. It's a perfect and smooth transition for the 4" pipe to the TB inlet. This seals to the throttle body with a 1/8" O-ring and a gasket between the new aluminum plate and the throttle body. A perfect seal.
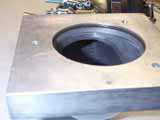
Here is the O-ring seal that I hand fabricated. It makes a perfect seal and turned out better than I had thought possible with just hand tools and a lot of devotion.
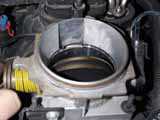
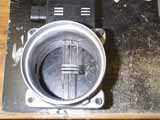
I decided to remove the lip or whatever you want to call it from the throttle body blade. I was hoping for two things: First was eliminating a barrier that was causing the water from the water injection from pooling and following the throttle blade shaft into the throttle position sensor which causes it to short out ( I went through 3 or 4 of them in 9 months) and second, maybe get a little more HP from less restriction and maybe a smother air flow.
The throttle response was much better, real responsive and snappy. I'm not sure why the factory put it there, I sure love it removed.
UPDATE: 11-19-00 Still working perfectly and the removal of the lip fixed the problem with the water shorting out the TPS sensor
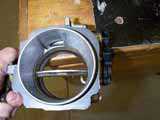
Since I had this off to do the water injection I decided to polish the tubes a little. I didn't want a chrome finish since I have no chrome on the truck.
MAF
This is the stock MAF before I ported it
This is after I ported it. I gained .4 tenths from 0-60 but it does hesitate or bog a little when giving it gas just off idle. I hope to fix this with a Modern Muscle Car MAF translator.
UPDATE: 11-19-00 went with a GMS MAF because the LTRIM's were way out of wack. GMS MAF with Ed Wrights programming was a great combination and I highly recomend it.
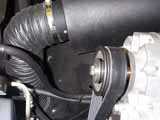
Fresh Air Tube
This is coming off the air filter and traveling down through the inner fender well. This is 4" heavy duty tubing unlike the cheap stuff at the auto stores.
This is looking at it from the tire forward to the lower air dam.
This is the revised water injection entrance. This was to provide a straight through water pattern so that water wouldnt collect on the sides of the tubes. Also, it's held in by a set screw so changing the nozzle is real simple and takes only a few seconds.